


R47 in Bedroom

Romanesque Wreath Glue-up Styrofoam Ceiling Tile 20 in x 20 in - #R 47

Additional Information
Product Name With Model #:
Romanesque Wreath Glue-up Styrofoam Ceiling Tile 20 in x 20 in - #R 47
Posted By:
Lisa King
Color:
Plain White
Project Type:
-Ceiling
Select Your Room Type:
-Bedroom
Did you hire a professional for this project?:
No
Tips:
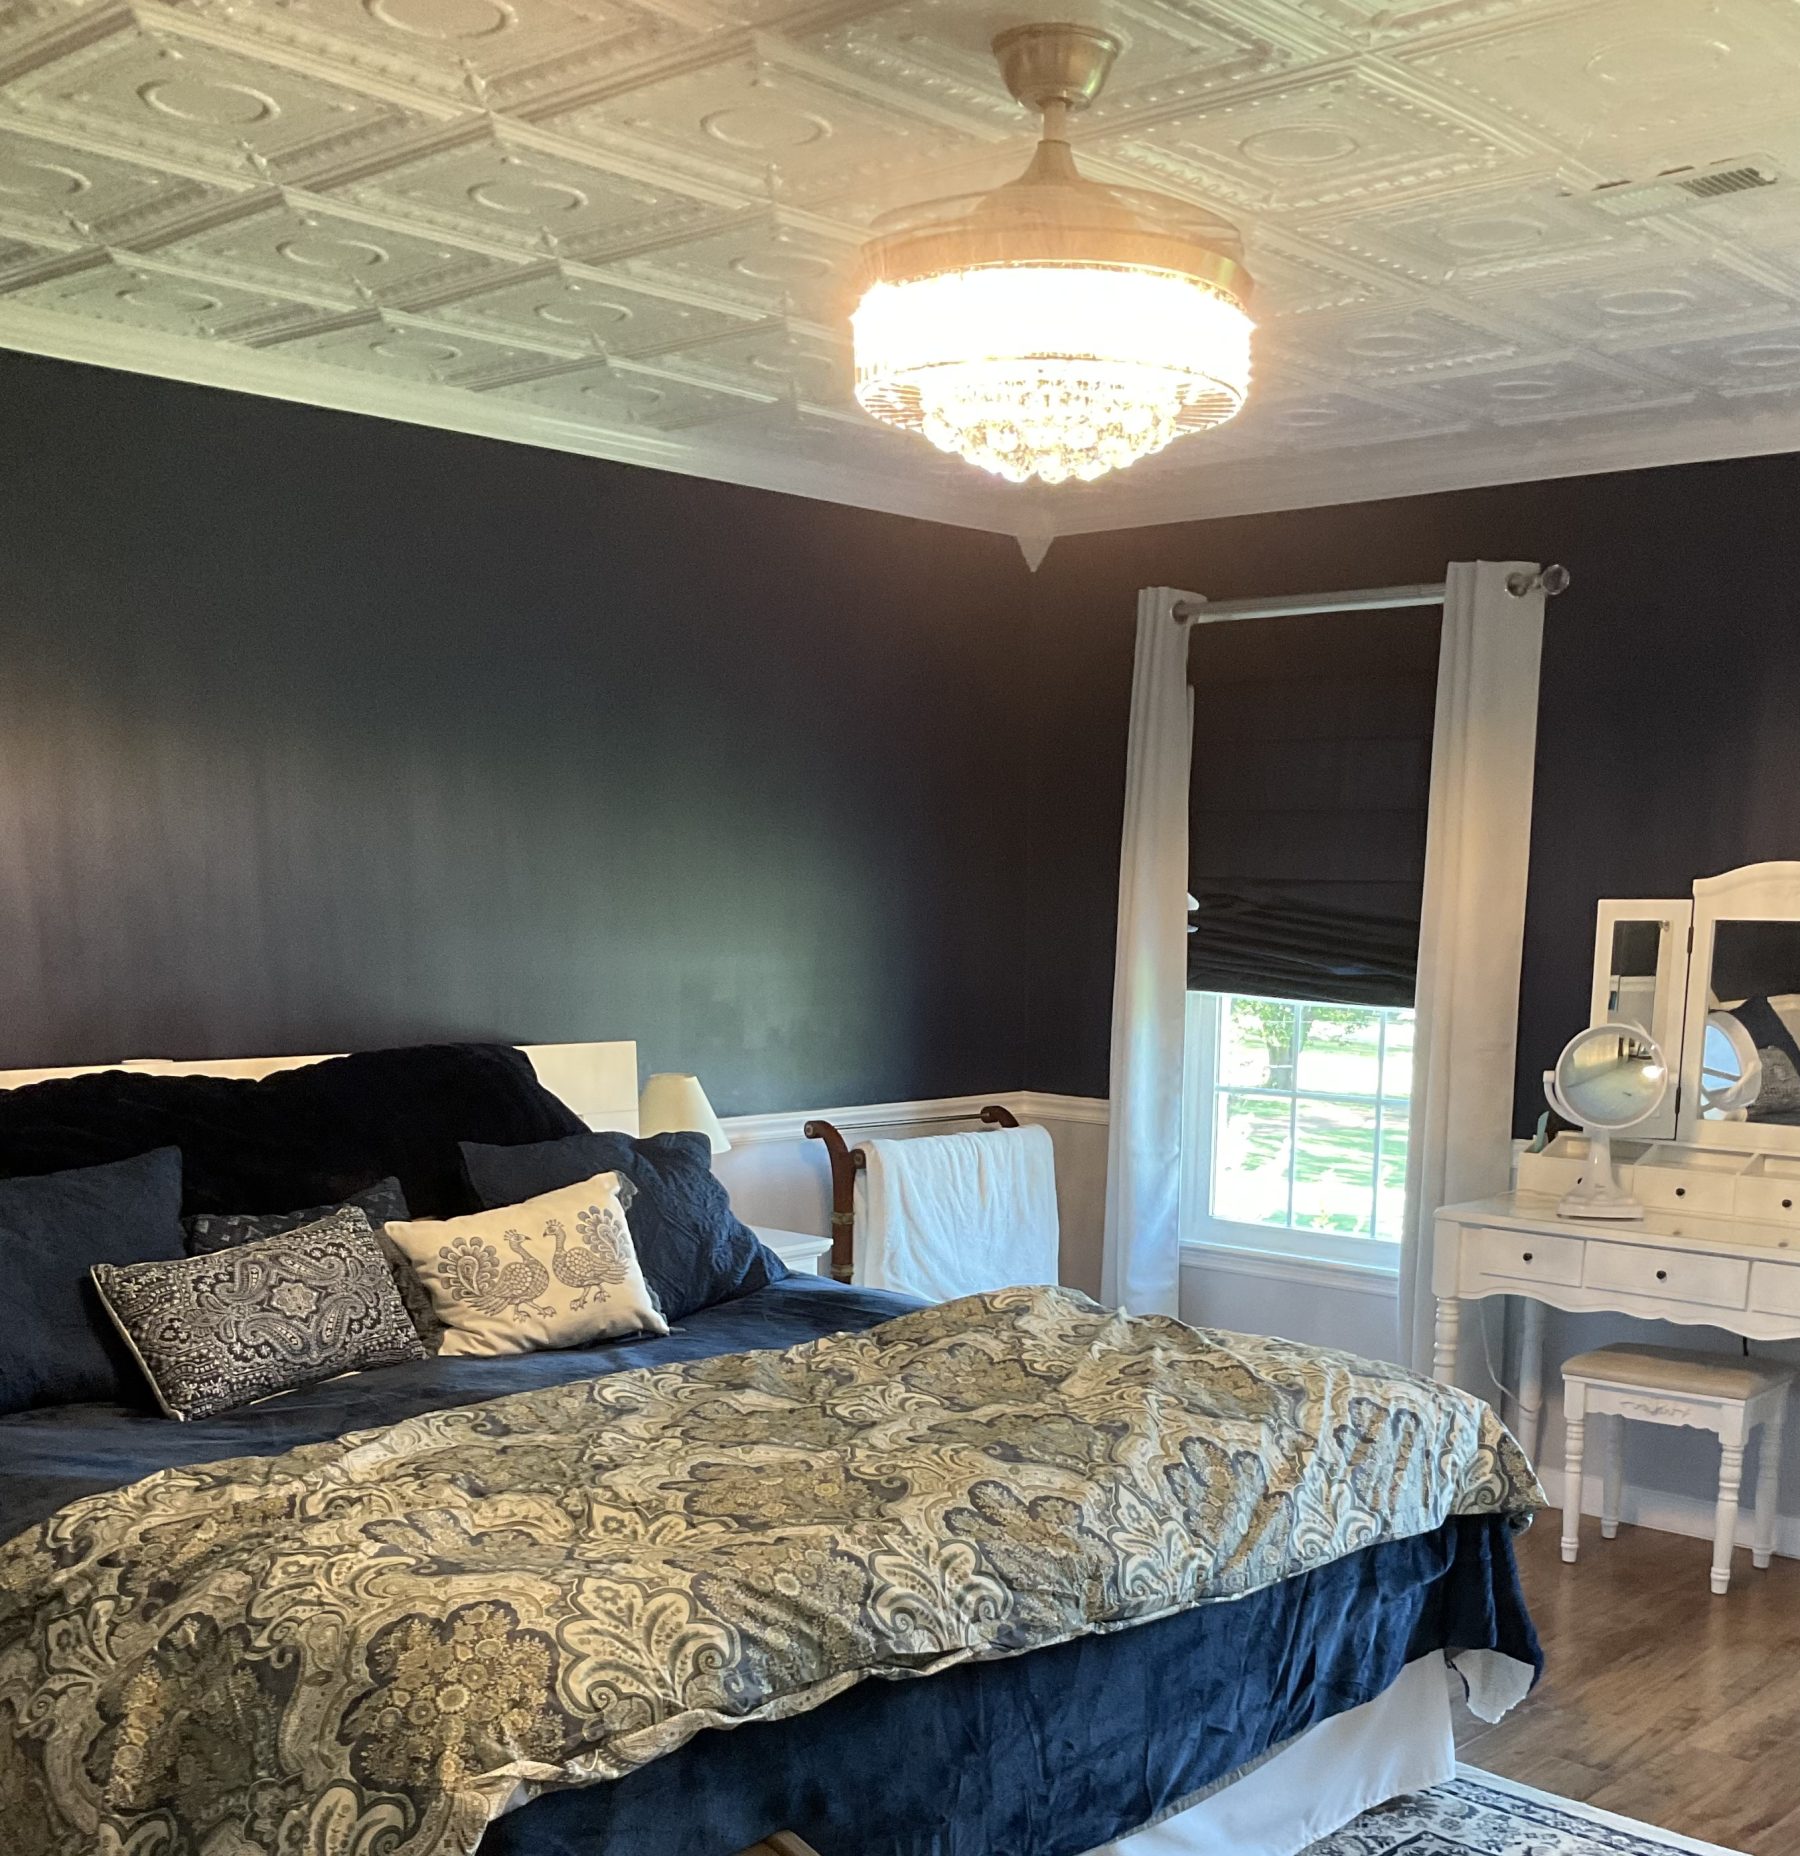
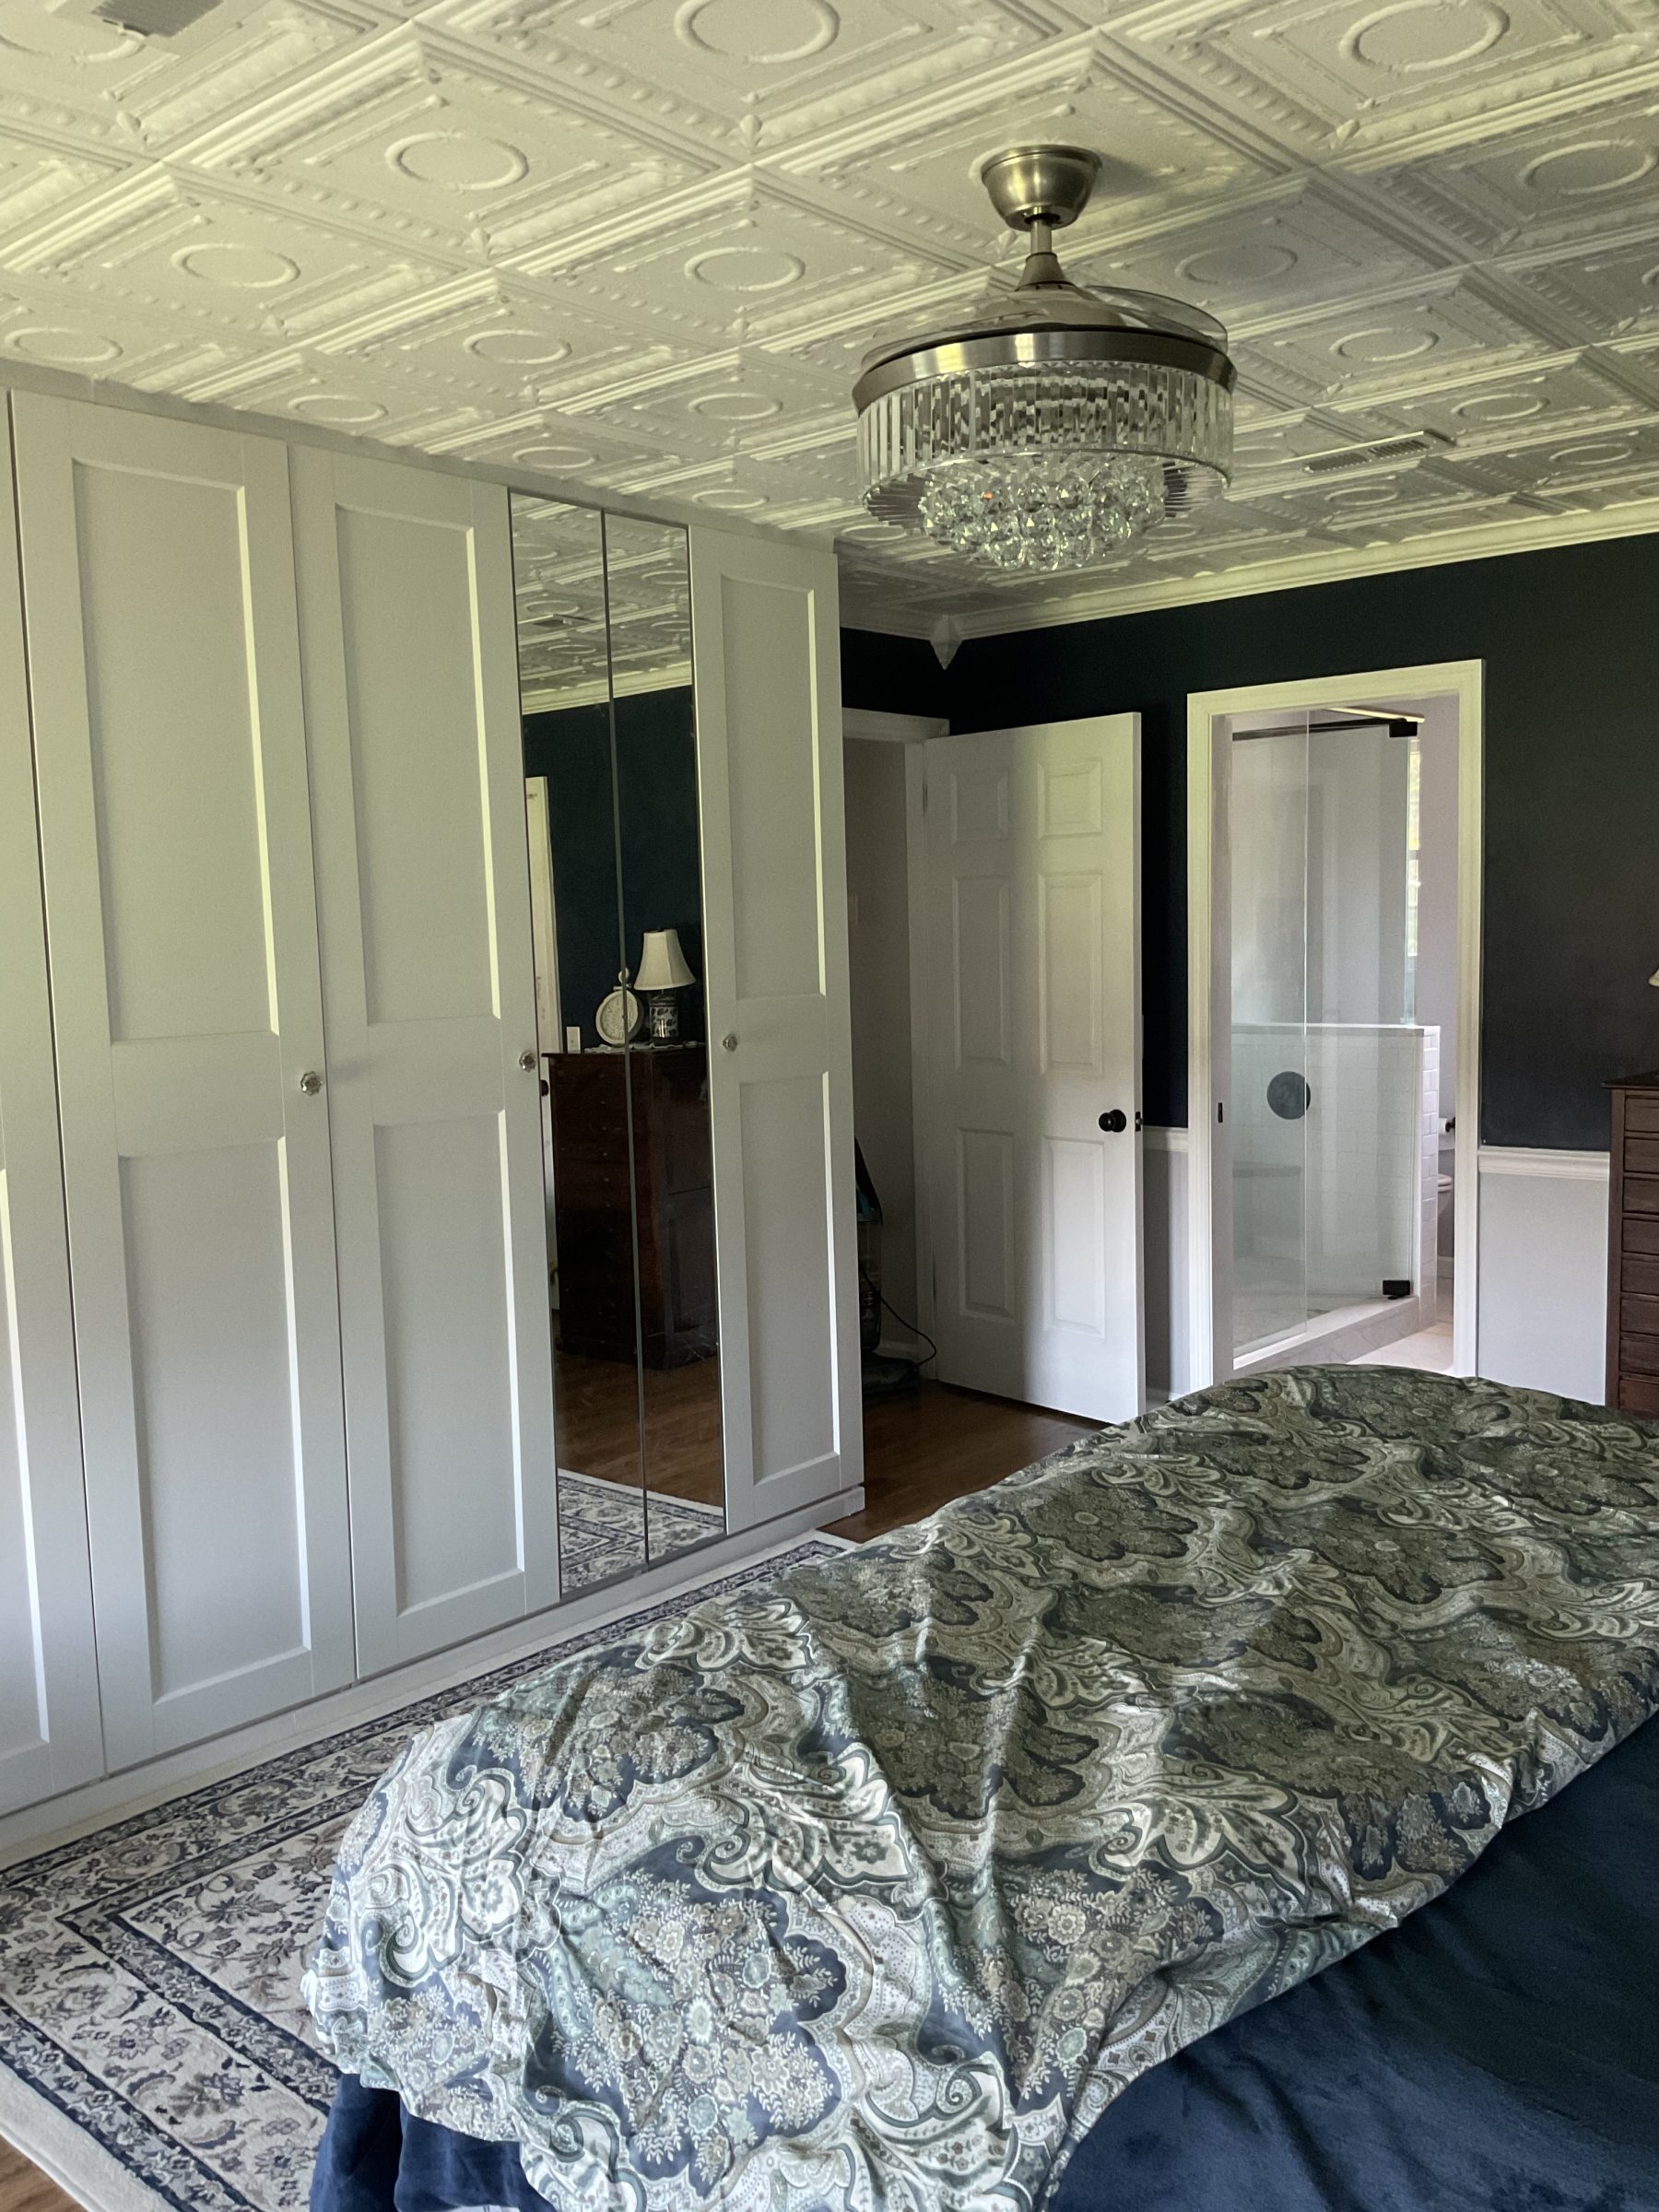
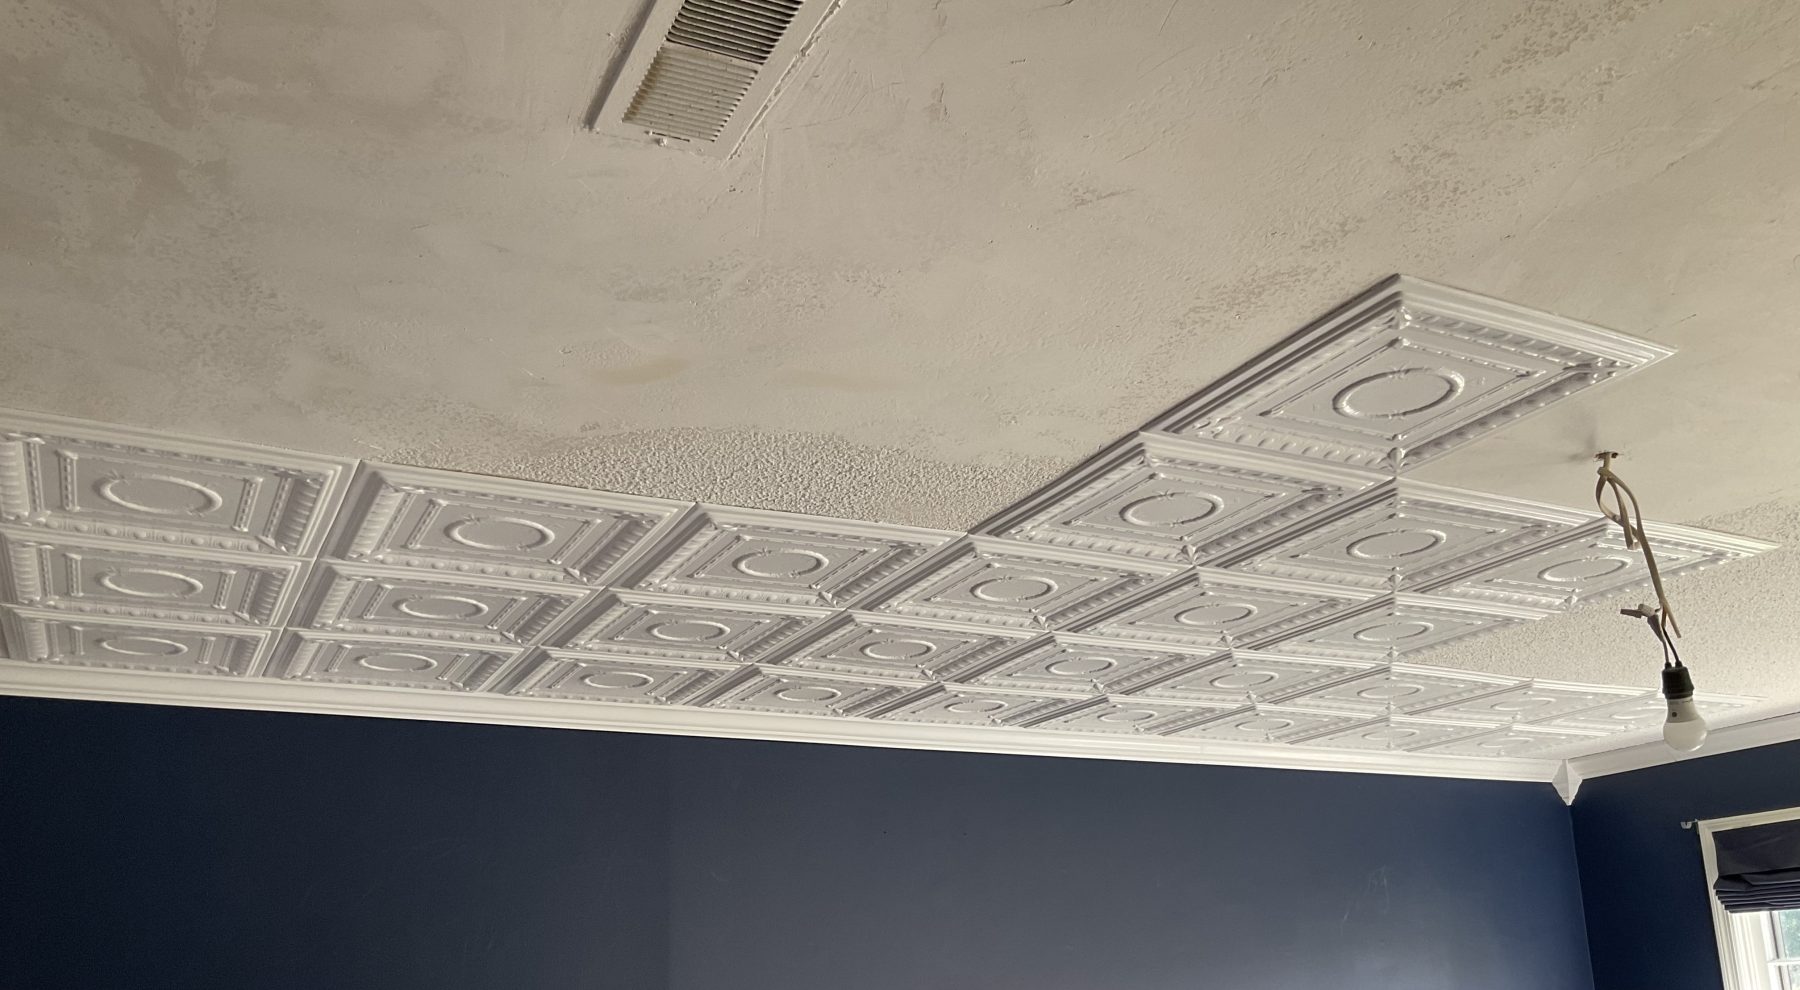
Glueing them up was the easy part. The most time-consuming part of the whole project was painting them. The second most time-consuming part was caulking the seams after the tiles were on the ceiling. I used 1 coat of Kilz primer and 1 coat of semi-gloss white paint, and DAP paintable all-purpose caulk. The biggest challenge was finding a large enough area to be able to paint a number of them at a time.These tiles are VERY lightweight so I had to be careful where I set them up for painting; the slightest breeze from an open window could flip them off the table.
When I first saw them, I thought, “Uh-oh. What have I done?” After the primer, they looked so much better. After the paint, they looked just like real tin tiles. You just have to have faith and keep painting.
Don’t be stingy with adhesive. There were some areas of the ceiling without any texture and I found that it worked better to use more, smaller blobs for smooth ceiling areas and fewer, larger blobs for the popcorn areas. Don’t rush — be prepared for a little trial and error, but once you figure out the right amount and pattern, it’s easy and the installation goes quickly.
It’s worth it to go over the caulk with the same paint you used on the tile because it gives a more seamless look. After all the glueing and caulking over your head, it’s tempting to be done after the last tile is caulked but that last step of painting the seams is absolutely worth it. It hides any imperfections in the installation and gives it a more professional finish.
Describe Your Project:
Used R47 to cover 15x17.5 bedroom popcorn-textured ceiling. Room has built-in closet units, air vents, and chandelier. Crown moulding was already installed.
Would You Recommend This Project To A Friend And Why?:
I’m a woman in my 50s with severe tendonitis in both hands. I did this project completely by myself. If I can do it, anyone can.
Local contractors charge about $3.19 per square foot to cover popcorn ceilings with drywall and another $600-700 to paint it ($1400-1500 total for my bedroom). It cost me about a third of that to install these tiles and they looks so much prettier and more expensive than plain drywall ever would have.
How Was Your Experience With Our Company And Why?:
My experience with the company was very positive. Everyone went out of their way to make sure I was happy with the tiles. They responded quickly to email questions and were always very helpful and accommodating.
View Product 


Photo Contest For December 2024
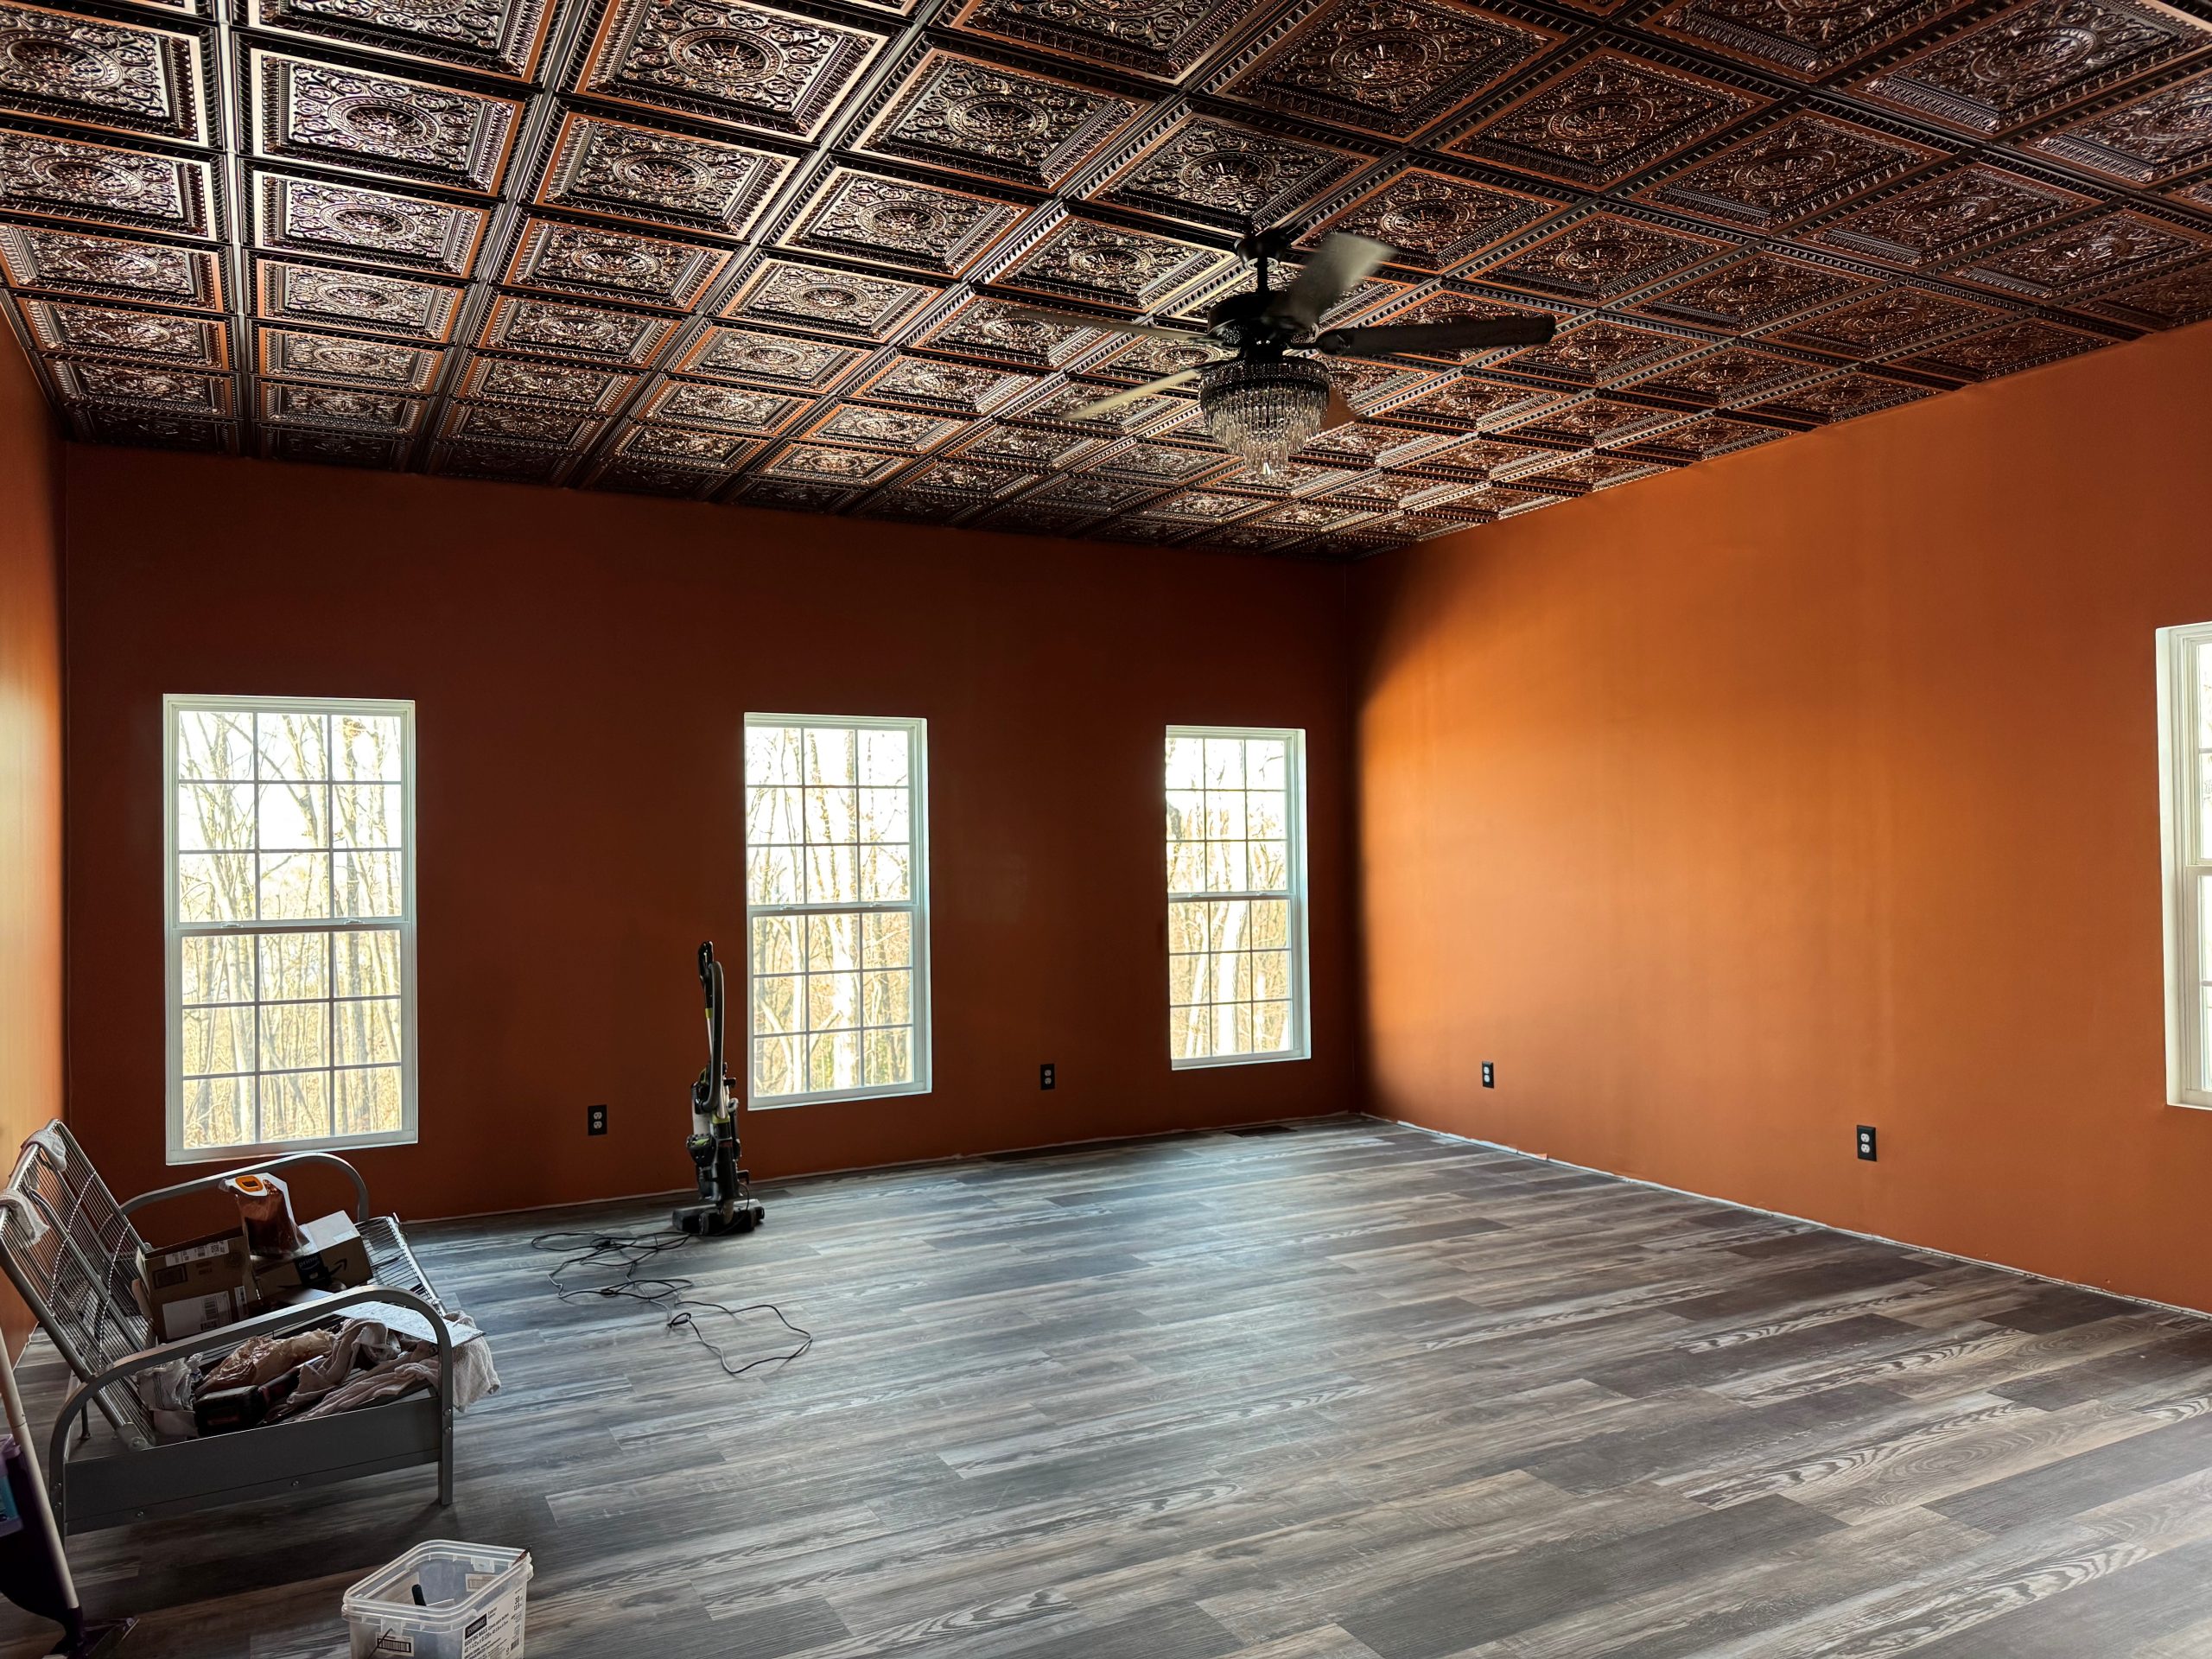
Photo Contest For January 2025

Photo Contest For January 2025


