Full Kitchen and Dining Room Renovation
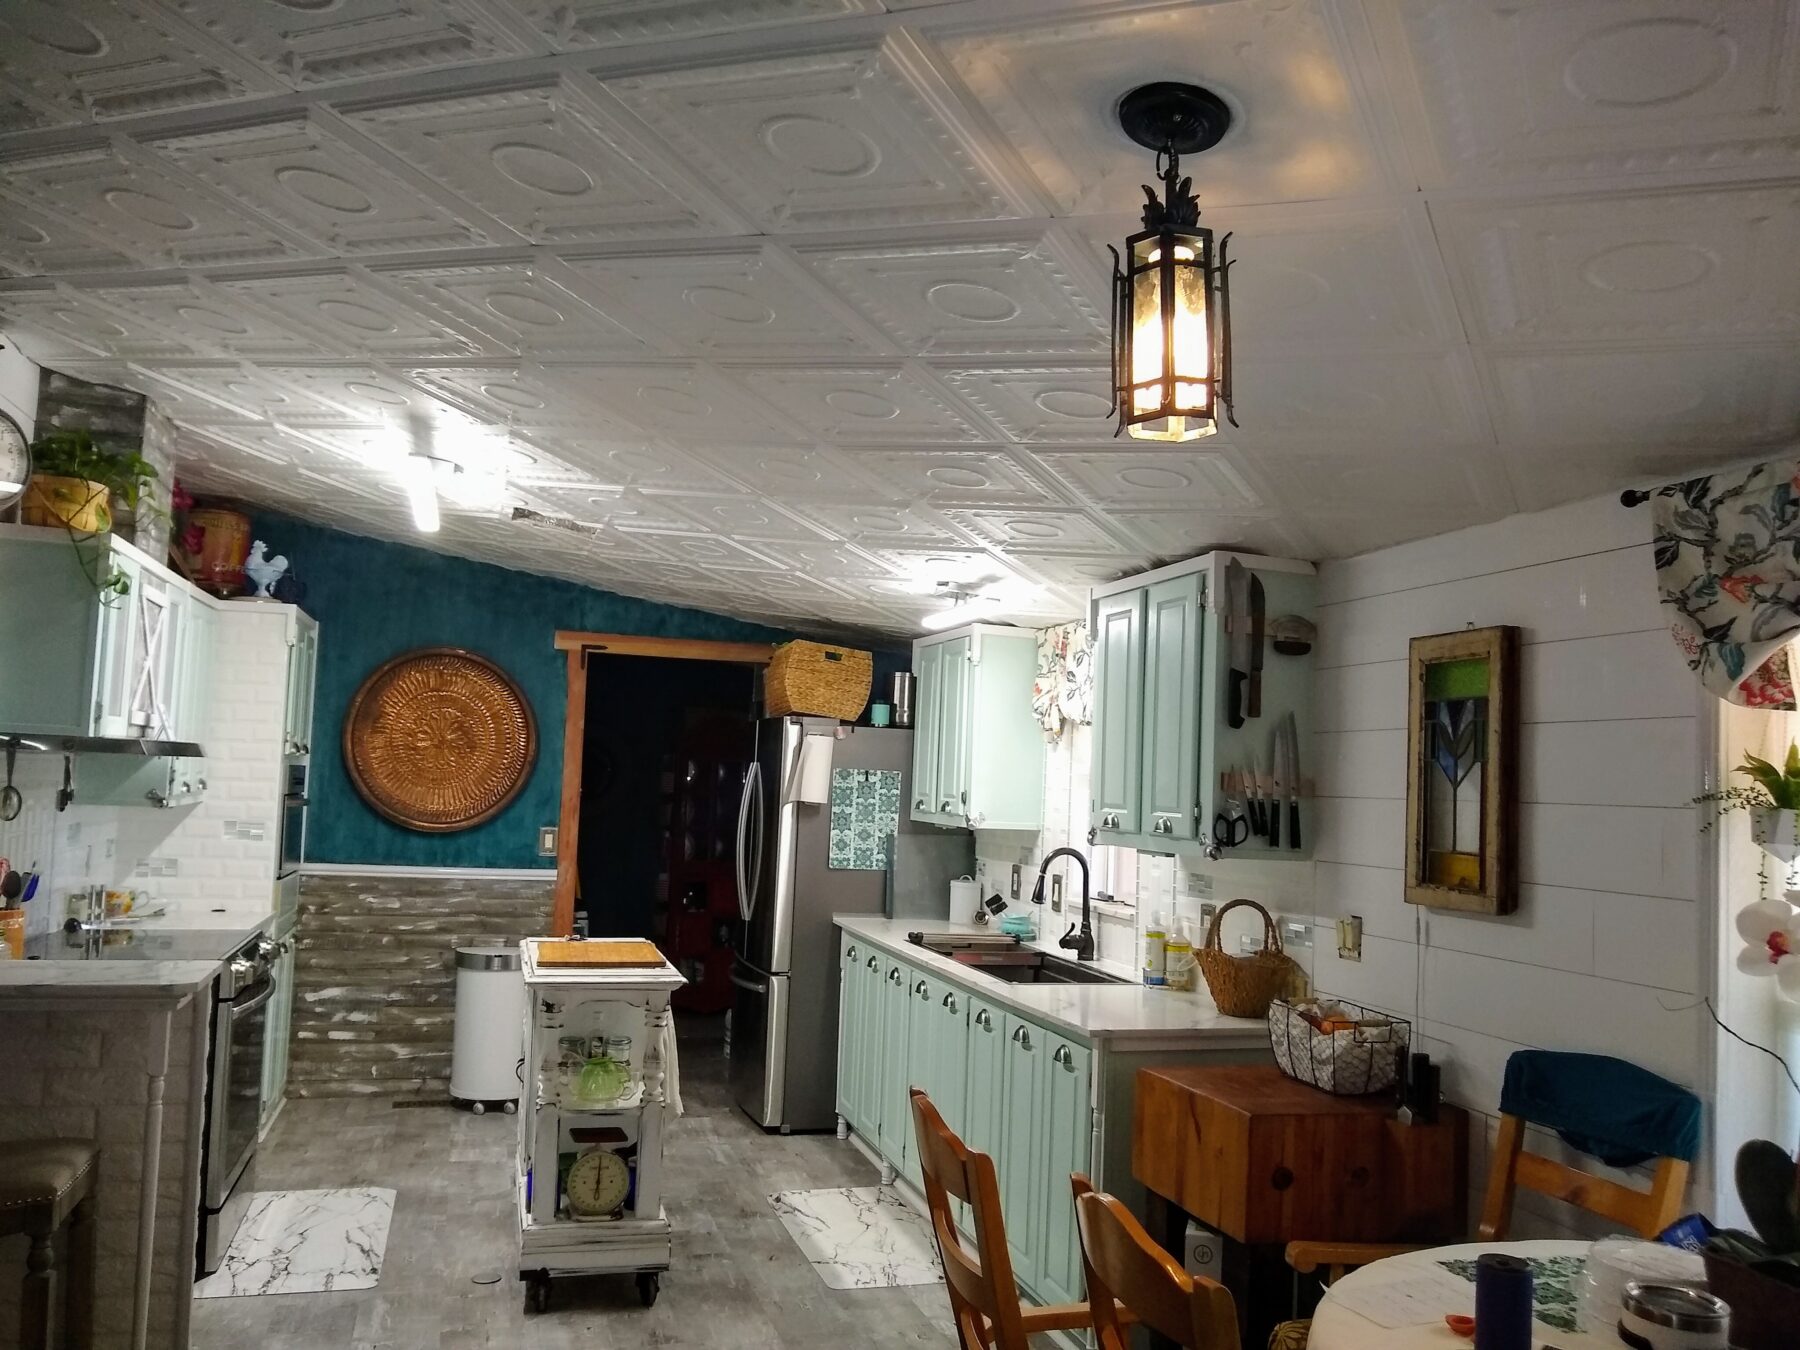
Romanesque Wreath Glue-up Styrofoam Ceiling Tile 20 in x 20 in - #R 47 -pw
Additional Information
Product Name With Model #:
Romanesque Wreath Glue-up Styrofoam Ceiling Tile 20 in x 20 in - #R 47 -pw
Posted By:
AnitaAZ
Color:
Plain white
Project Type:
-Ceiling
Select Your Room Type:
-Kitchen
Did you hire a professional for this project?:
No
Tips:
When setting on a diagonal, set the first tile centered over the focal point light fixture electric box. In my case the dining room light fixture is the first thing you see when you walk into my home.
Describe Your Project:
Full Kitchen and Dining Room Renovation, everything was replaced or renovated,
KITCHEN
-CEILING from popcorn ceiling to foam tiles,
-COUNTERTOPS from mauve laminate to repurposed marble quartz. I reinforced the lower cabinets to accommodate the heavier weight.
-SINK from 30" stainless 2 bowl to 45" stainless single bowl workstation.
-RANGE HOOD from 90's version with mesh grease catcher to stainless slimline professional.
-ISLAND from a built in with an electrical outlet to a mobile cart with flip out countertop extensions then installed a floor outlet for power.
-WALLS from wallpapered drywall to strie and wood accent wall then subway tile with color accent pieces on backsplash areas.
-CABINETRY renovated from pressed board with oak laminate to cabinet specific paint with hardware relocation and replacement.
- FLOOR from rolled vinyl to snap lock planks.
- MICROWAVE from countertop 90's version to built in repurposed stainless steel.
-ELECTRICAL outlets from yellowed to updated with new faceplates.
- LIGHT FIXTURES from flush mount single bulb clear globes to adjustable 48" and 24" slim LED fixtures, made to go over bathroom vanities, I chose these for their small footprint against my new tiled ceiling, the ability to adjust their angle, they don't protrude down far from my low ceilings, and the light output.
-DOORWAY was widened 8" to accommodate the giant refrigerator, now allowing the left door to open, and it no longer has to live in my dining room, then clad in redwood.
- MAGNETIC knife racks mounted on end of upper cabinets, next to my meat block/butcher block, this is where the refrigerator used to live.
DINING ROOM
- CEILING from popcorn to foam ceiling tiles.
- FLOORING from mauve carpet to laminate wood planks.
- WALLS from textured drywall to repurposed solid wood exterior Shiplap planks.
- LIGHT FIXTURE, from flush mount single bulb globe to repurposed handmade hanging fixture.
- DINING TABLE from not having one since the refrigerator was in the way to a solid wood repurposed.
Total time it took me by myself, other than having help to lift the countertop with the sink cut out, around 6 weeks working on it 5 days a week 8-12hours a day, with many trips to the store. I was only planning on doing a tile backsplash, then it turned into a full renovation, winging it along the way.
For the ceiling tile joints, let me start by saying my ceilings are low, 7' at the eave and 8-1/2' at the peak so the imperfect tile joints are easily seen. I did a test area filling the joints with silicone, I didn't like the mess or how it looked, so I hunted and found a tape like product used to recover the drop ceiling frame grid. It is a rigid plastic with an adhesive side and goes up quickly, although you will want to add a few drops of same adhesive used to install the tiles every 6" or so, as the adhesive back doesn't want stick well to the styrofoam and will droop down overnight.
Would You Recommend This Project To A Friend And Why?:
Yes I would reccomend using these tiles, the final appearance is better than any flat or textured ceiling treatment applied.
These tiles are easy to work with and weigh about the same as a styrofoam cup, almost nothing. They cut easily with a razor blade, and are forgiving when lining them up. They can be directly applied over popcorn/acustic ceilings, you will want to sweep or vacuum any loose particles off the ceiling before installing. These can be used as a small accent project or full ceiling
I found out after scrapping off 1/3 of my unpainted popcorn living room ceiling, the cost of materials, labor intensive holding your hands above you head for extended periods of time, the mess to clean up the droppings even if you have a disposable drop cloth, then there's the process of filling imperfections hidden by the popcorn texture, then retexturing and painting. It wasn't worth it to me.
How Was Your Experience With Our Company And Why?:
My ordering process was smooth, I didn't have any questions until after installation. I emailed and was responded to the next day. If I had needed an immediate response I would have called.


