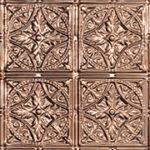
Princess Victoria – Aluminum Backsplash Tile – #0604

| Application | : | Backsplash | |
| Category | : | Kitchen | |
| Size | : |
|
|
| Material | : | Aluminum | |
| Color | : |
|
|
| Installation Method | : |
September 4, 2020
 |
 |
 |
 |

| Application | : | Backsplash | |
| Category | : | Kitchen | |
| Size | : |
|
|
| Material | : | Aluminum | |
| Color | : |
|
|
| Installation Method | : |
September 4, 2020

| Application | : | Ceilings | |
| Category | : | Kitchen | |
| Size | : |
|
|
| Material | : | Copper | |
| Color | : |
|
|
| Installation Method | : |
September 3, 2020

| Application | : | Ceilings | |
| Category | : | Kitchen | |
| Size | : |
|
|
| Material | : | Styrofoam | |
| Color | : |
|
|
| Installation Method | : |
September 3, 2020
"The ceiling was the finishing touch to my newly renovated kitchen. Would definitely recommend to a friend. It is a relatively inexpensive way to make any room stand out. Easy to calculate. Easy to order. Quick delivery."
Tips: Snap chalk lines across the ceiling from opposite corners. Where the chalk lines intersect is the precise center of the room. Now snap a chalk line through this center point across the width and length of the room. Now you are ready for your first four tiles. The rest is easy by making sure you place the tiles perfectly adjacent to these four tiles. I put the crown moulding on last and used crown moulding caulk between the crown moulding and the ceiling tiles for that finished, professional look. If you are painting, I used a flat white on the ceiling tiles before installing the crown moulding. I painted the crown moulding a gloss white prior to installation. This ceiling job really gave my newly renovated kitchen a classy, finished look.
- Joseph Asciutto

| Application | : | Ceilings | |
| Category | : | Kitchen | |
| Size | : |
|
|
| Material | : | Styrofoam | |
| Color | : |
|
|
| Installation Method | : |
September 3, 2020

| Application | : | Ceilings | |
| Category | : | Kitchen | |
| Size | : |
|
|
| Material | : | Styrofoam | |
| Color | : |
|
|
| Installation Method | : |
September 3, 2020
"DIY Kitchen Remodel. Good company and fun choices. Very good. Being able to get samples so we could pin them and see what we wanted was very helpful."
Tips: Use a snap line for centering long. Only put up a little at a time so you don't get tired. Pick the pattern layout before you start. We went with all the tiles going in the same direction. Be very careful of scratching.
- Sharon Haight

| Application | : | Ceilings | |
| Category | : | Kitchen | |
| Size | : |
|
|
| Material | : | Styrofoam | |
| Color | : |
|
|
| Installation Method | : |
September 3, 2020

| Application | : | Ceilings | |
| Category | : | Kitchen | |
| Size | : |
|
|
| Material | : | Styrofoam | |
| Color | : |
|
|
| Installation Method | : |
September 2, 2020
| Application | : | Accessories | |
| Category | : | Kitchen | |
| Size | : |
|
|
| Material | : | - | |
| Color | : |
|
|
| Installation Method | : |
September 2, 2020

| Application | : | Backsplash | |
| Category | : | Kitchen | |
| Size | : |
|
|
| Material | : | Tin Plated Steel | |
| Color | : |
|
|
| Installation Method | : |
September 2, 2020

| Application | : | Ceilings | |
| Category | : | Kitchen | |
| Size | : |
|
|
| Material | : | Styrofoam | |
| Color | : |
|
|
| Installation Method | : |
August 6, 2020
"The company was very responsive to my inquiries and resolved the matter to my satisfaction. We were intrigued with the thought of the styrofoam tiles in their light weight and style. We ordered samples and were impressed with them. After we purchased them, we opted for a light grey semi-gloss. We then sprayed the tiles and the molding. After we put them up, we noticed some lighter spots where the spray did not cover towards the bottom of the tiles so we opted to roll them as well. The second coat brought them a finished look. We have recommended it. It is relatively easy to do and the finished product looks exceptional. "
Tips: We used a sprayer to paint the tiles and molding. Then we followed that with a small paint roller after we put them up. I recommend caulking before the second paint rolling. The caulking gives the project a finished look.
- Susan Smith


